My old hard drive started sending SMART errors. I purchased a new hard drive and tried to clone it…but alas, it would not clone. So, I re-installed the OS. I am able to access files from the old drive, so I need to figure out how to migrate my iTunes library from the old hard drive to the new one. Here are the steps I took. My new hard drive is my C: drive and my old drive is my F: drive.
- Browse to the old drive and choose the iTunes “library.itl” file. This will load up the iTunes library from the old hard drive.
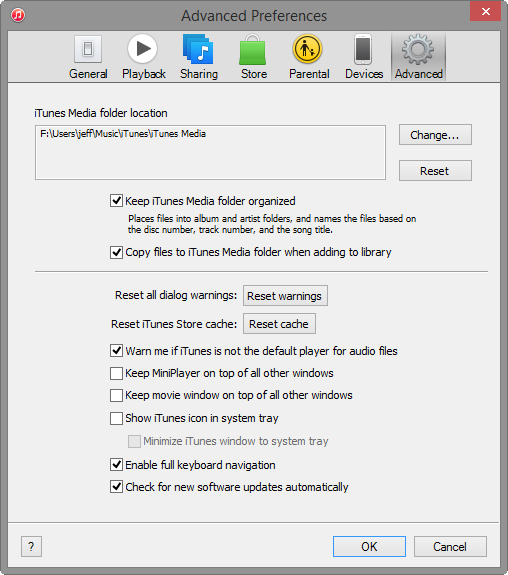
- Now we need to move the iTunes library to the new hard drive. Select Preferences => Advanced. You should be viewing the following screen.

- Select “Keep iTunes Media folder organized.”
- Click OK.
- Select iTunes => Preferences.
- Select the Advanced button.
- Select the Change button in the “iTunes Media folder location” pane. The Change iTunes Media Folder Location window appears.
- Choose where you want to save your new iTunes Media folder.
Note: Your iTunes Media folder is named “iTunes Media” in ~/Music/iTunes/ (the tilde ~ represents your home directory). - Click OK in the Advanced window.

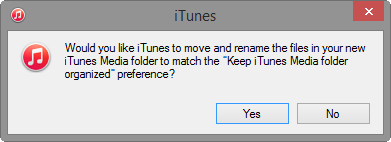
- The following prompt will come up. Select “OK”.
- Now we need to consolidate the libraries.
- You will now need to activate the Menu Bar to finish this task. If you see the menu bar, you can continue to step #. If not you have two options:
- You can select “CTRL + B” or
- You can go to the drop down menu in the upper left corner and select “Show Menu Bar” option.
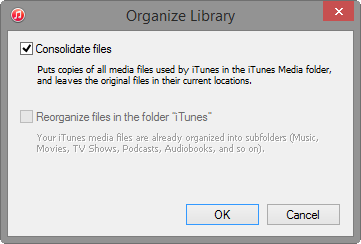
- In the Menu Bar, Select File => Library => Organize Library. The following screen will show:

- Select “Consolidate files.”
- Click OK.
- All of your media files should copy to the new location. This will take some time depending on the size of your media files.
- After the folder copies. Quit iTunes.
- Find your original iTunes Media folder and rename it to old_iTunes.
- Open iTunes again.
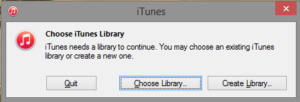
- If you see the alert “The folder containing “iTunes Library” cannot be found, and is required. Please choose or create a new iTunes library.” you will need to manually move the “library.itl” to the new iTunes Library location.
- Stop iTunes.
- Copy the file to the new iTunes folder.
- Restart iTunes.
- When the alert “The folder containing “iTunes Library” cannot be found, and is required. Please choose or create a new iTunes library.” comes up, select “Choose Library”. Select the “library.itl” file in the new location.
- If you can open and close iTunes without seeing the alert, you can now safely delete the old iTunes Library.
This will provide a general guideline I used to recover iTunes library after replacing my hard drive.
